


Git started with GitHub and ARCAD on IBM i
by Ray Bernardi
I have been experimenting with Git as the repository for IBMi native source like RPG, CLP and so on. Git seems to be the source repository of choice at the moment and using it for native code seems to open up a whole new world to IBMi developers. Imagine being able to branch and merge IBMi code as easily as you do your PHP code. Imagine adopting agile methodologies for native development, builds and deployments. Imagine never having to “check-out” code and jump through those hoops. That’s what Git allows, and it’s really not that hard to accomplish.
The first thing you need is a Git repository. That’s not really hard to do. If you have Git Enterprise your repository is going to be in house and controlled by you exclusively. If you use the cloud, there are several places that will host your repository, the most used being GitHub. GitHub adds value to this solution because it improves collaboration between people in your teams.
For purposes of this post, I will use GitHub. It’s free, and you’ll be able to follow along and do what I do without asking the boss for any money. The repository we create will be a public repository. GitHub hosts public repositories for free. The code you decide to put there will be available to anyone using GitHub, so use example code, not your companies most sensitive programs. The idea is to learn the techniques for future use in a real setup with real code.
First let’s cover getting existing code in a Git repository on GitHub. If you haven’t done it already go to https://github.com/ and create an account. It’s about as hard as enrolling in eBay so I’m not going to cover all those steps here. I’m pretty sure you’ll be able to figure it out.
Once you have an account look for this button:
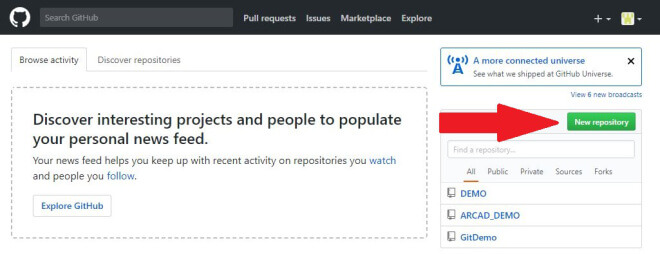
You guessed it, go ahead and click it. You’ll see a dialog box like the one below.
The red arrows are where I added information.

I left the repository Public, that means free. Private repositories can be free under some circumstances, but typically they are paid for. I also checked off the initialize repository with a readme file button. That basically gives me a single file in the repository to start with. We are creating a bare bones repository, that means it’s empty right now.
When you are finished, you’ll see a page like this:
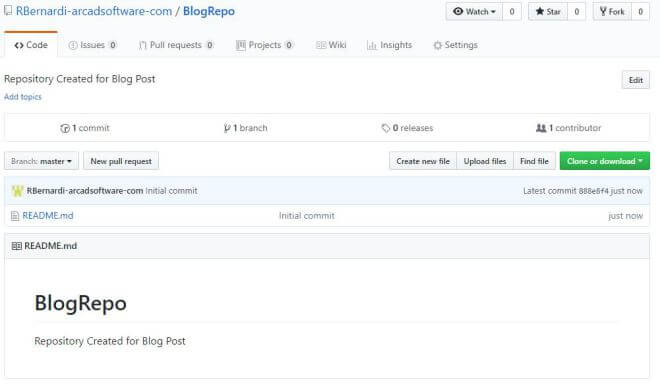
It’s a brand new Git repository with one readme file in it ready to receive your IBMi code. The next step is in RDi. To use Git in RDi you need eGit. It’s free. You can find it and download it and add it to RDi easily if you are familiar with RDi. I won’t cover those steps here, I will assume you managed to get eGit installed ok and can see the following screen:
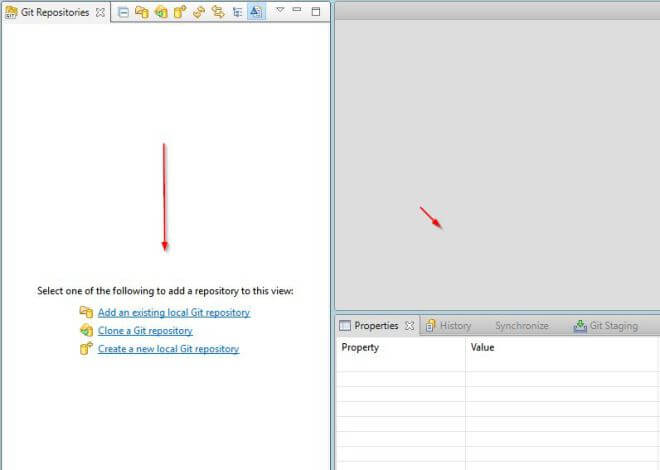
The red arrow points to the action items. What we have right now is a Git repository out there in the clouds. What we need is a local version of that repository in our local workspace. The way we do that is to clone the repository.
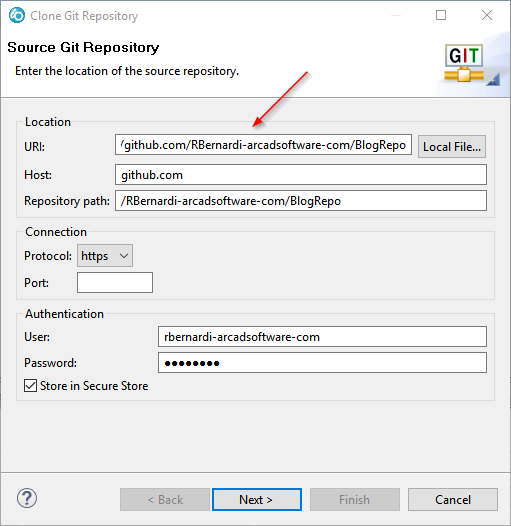
You’ll see the screen below. It will not be filled in. A trick I have learned is open a browser to your GitHub repository and cut and paste that here. It fills in a lot for you when you do. The completed screen for me looked like this:
The following screens appear after clicking next.
Take all the defaults we don’t need to change anything:
Right now we only have a master branch, we will discuss branching later…
Again, we take the defaults.
When all is said and done you end up with a screen that looks like this after you expand things:
We just created a local version of the remote repository. The eGit perspective allows us to see the Git repositories and their branches. It does more, but for now that’s enough. What we have is a Git repository that RDi knows how to use. That’s the important thing we accomplished above. Now we need to get some IBMi code into that repository. We do that in RDi in the iProjects perspective.
Once in that perspective (again, we are not learning RDi, I’m sure you can get there), right click to create a new IBMi project. You will see the following dialog:
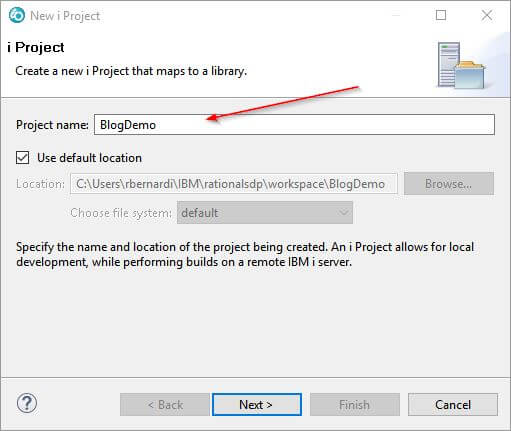
Give your project a name and take the defaults. When you click next you’ll see the following screen:
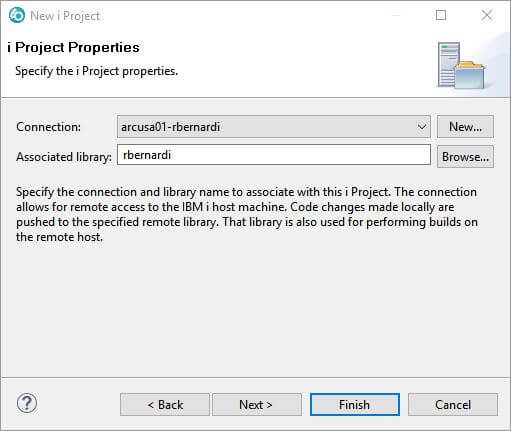
The connection is to the IBMi that contains the source code you want to add to the iProject. The associated library has nothing to do with the source itself, in this case I simply put my own personal library. This associated library never seems to come up again and I’m not really clear on what it’s used for. If there’s anyone insane enough to have read this far, and you know what it means, please fill us in. In the meantime, click finish. You end up with an empty iProject.
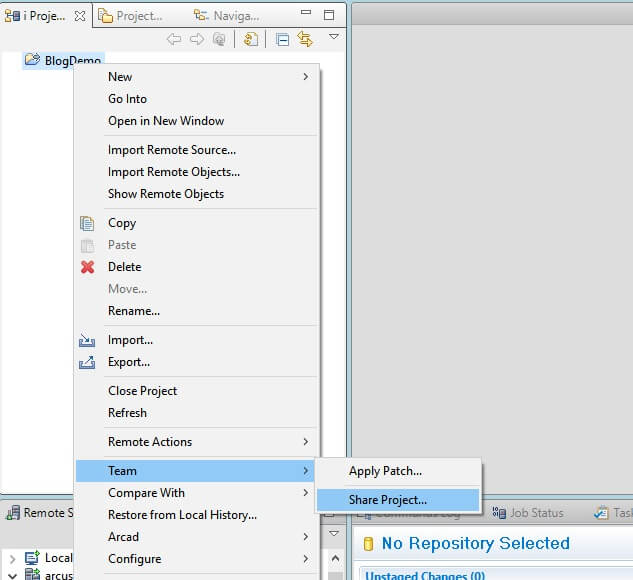
Now we need to hook the iProject to the Git repository we created earlier. Right click the iProject and choose Team>Share Project as seen here:
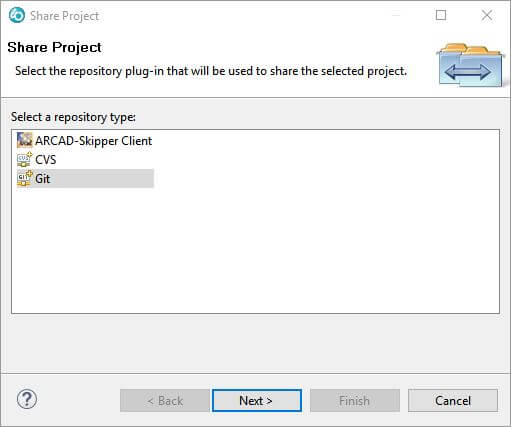
Then choose Git:
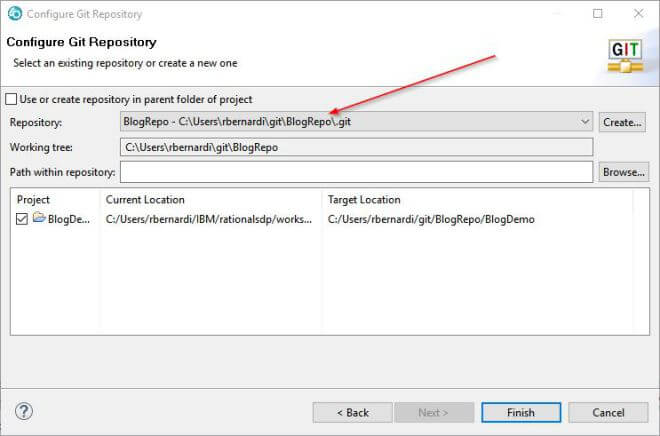
When the next screen appears, click the dropdown shown and select the repository you just created as seen here:
Click finish and you have successfully connected an iProject to a Git repository on GitHub in the clouds. You are becoming a very modern developer. Wait, hold on, there’s still no IBMi source in this repository right? Right. Let’s get it there. It’s not hard to do. If you have used iProjects before, you already know half the steps. Because Git is involved, we are going to add those steps here.
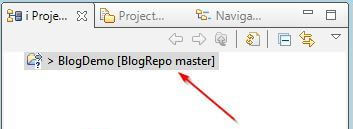
If you look at the iProject you just created, you’ll notice some Git information has been added. It identifies the repository and branch you are connected to. Notice it says “master” right now as in the master branch as seen below:
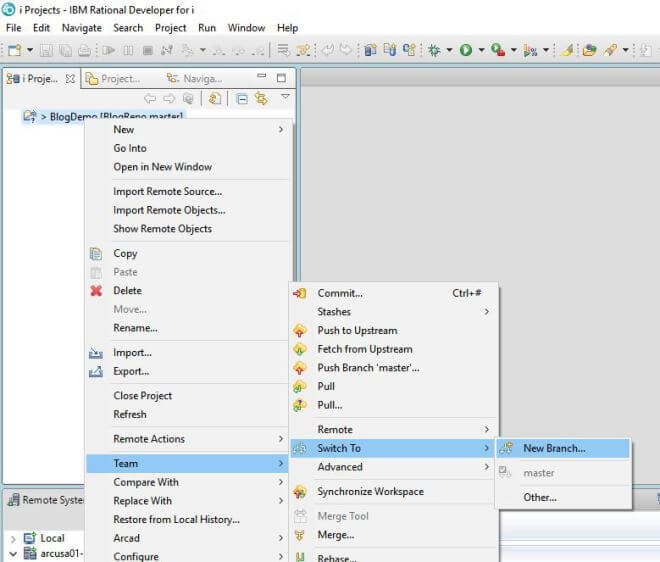
Let’s be good developers and not work directly on the master branch. Typically, work in Git is done on a feature branch that is ultimately merged back into the master branch. To create a new branch, while in iProjects, right click the project and choose Team>Switch to>New branch as seen here:
You can see how I filled out the panel below. Make sure you check off the configure upstream box as seen here:
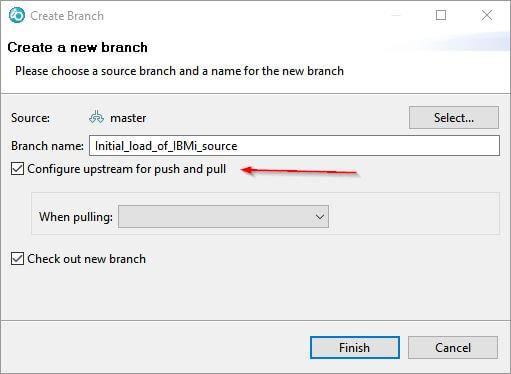
Leave the checkout box selected and click finish. When you return to your iProject panel, the project will be updated with the new branch information.
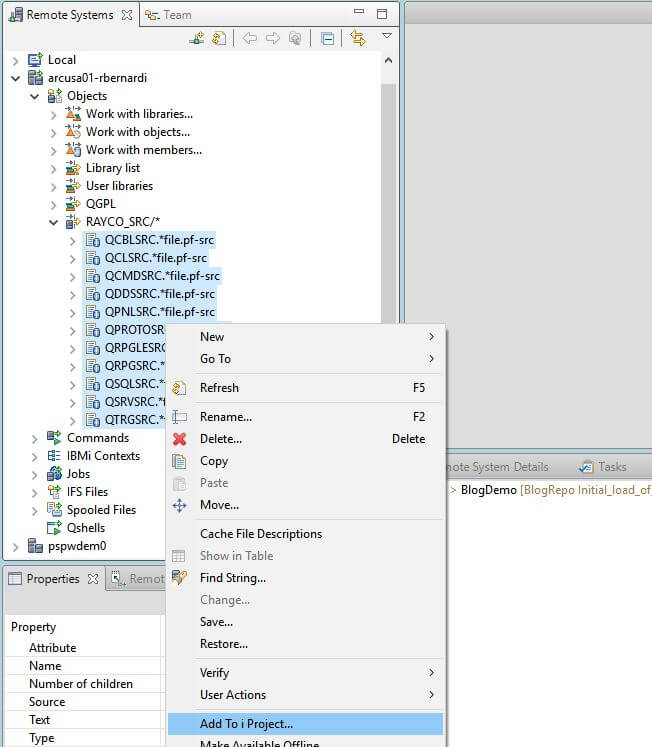
Now we can finally add the IBMi code. To do that we use the Remote Systems Explorer perspective. In the screen shot below I have created an object filter over my production library and I have selected anything that begins with Q – that gives me my source files. I have standard names so this works for me, if you use different names, obviously you’ll need to adapt your filter.
Highlight all the source files you want and add them to the iProject as seen here:
This will download the IBMi native code to your local workspace and associate them with the iProject.
Now return to the iProject perspective and add the Git Staging view to it. You could also use the Git perspective to see this view, but I find it very helpful to have it displayed in the iProject perspective. You will see something like I see here:
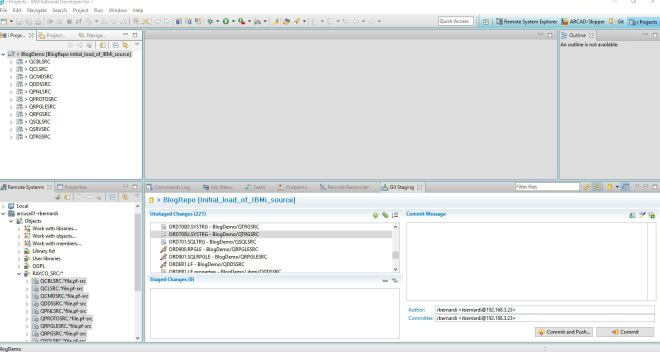
Notice the unstaged changes. Git is at work here. You added all your source to this project that is being controlled by a local Git repository. You can make changes all day long, they are not real until you stage them and commit them. There are three file states in Git, modified, staged, and committed. Right now we are simply modified.
Click in the unstaged area and do a CTL+A to select everything. Once done drag them all to the staged area. Your screen should look like this:
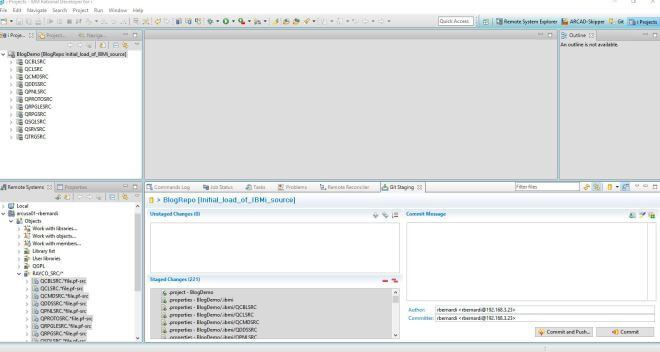
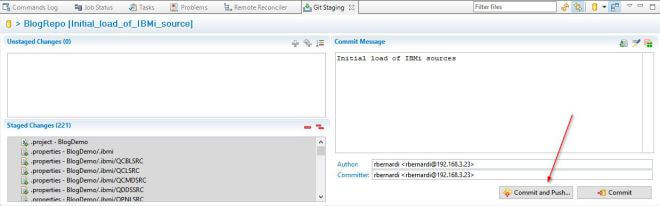
Now we need to do a commit and push. You can’t do it without a comment so in the comment area enter something like Initial load of IBMi sources. A commit is local. A push is remote. This is not a required step, but lets look at the Git Repository using eGit real quick so we understand what’s about to happen. When we look we see this:
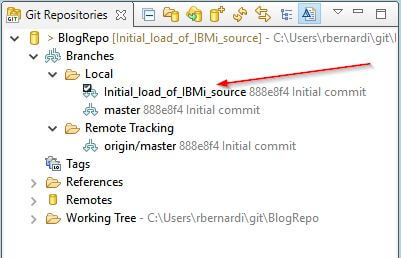
There’s your local branch, you created it when we did the Switch to earlier. Look at the remote side. It doesn’t exist. Commit puts the changes you have made in your local workspace into the local branch of the Git Repository you are hooked to. Push creates that branch on the remote server and makes your code available to others.
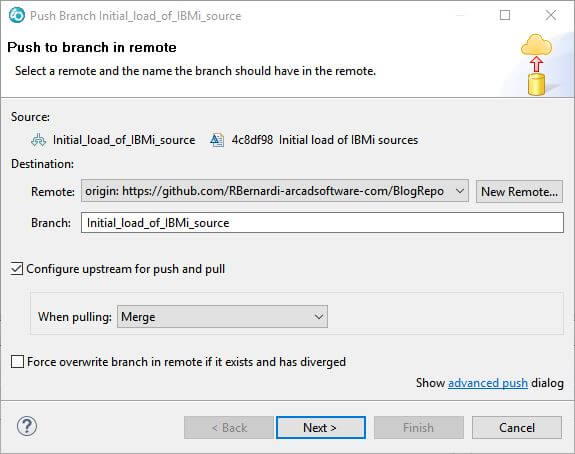
Let’s return to iProjects and perform the commit and push as seen here:
You will see this dialog box identifying the remote repository and branch you are pushing to, you don’t need to change anything just click next:
You will get a push conformation as seen here:
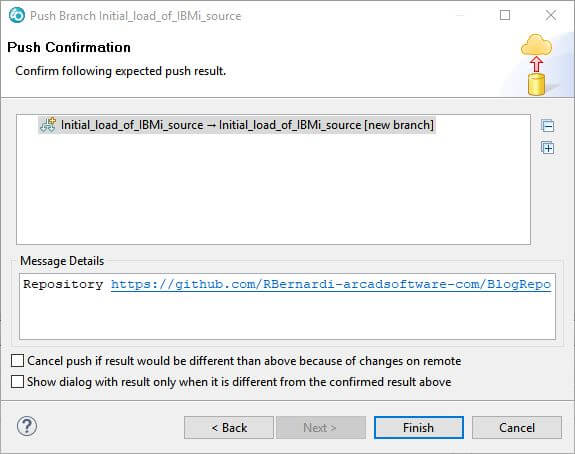
Click finish and you should receive the following confirmation:
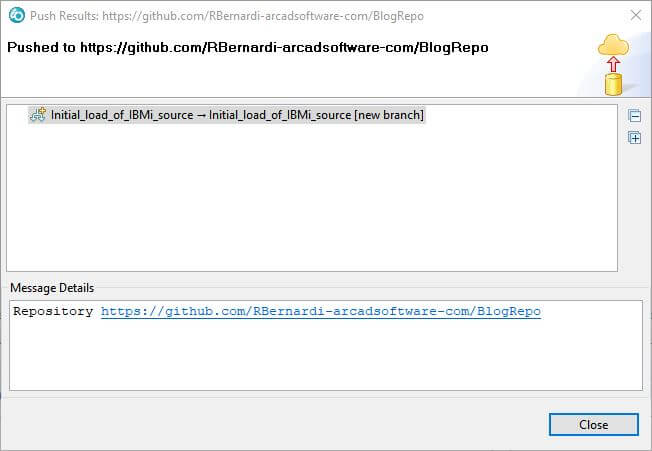
You can click finish. You just did your first push to a Git repository in the clouds. Wow. Not too shabby.
If you return to the eGit perspective, you will see the following:
You created that remote branch during the push. Anyone else who clones this repository can clone that branch as well and that’s your code. The branch needs to be merged onto the master branch at some point, we will do that in GitHub.
Return to your repository on GitHub and you will see that something new has been added as seen here:
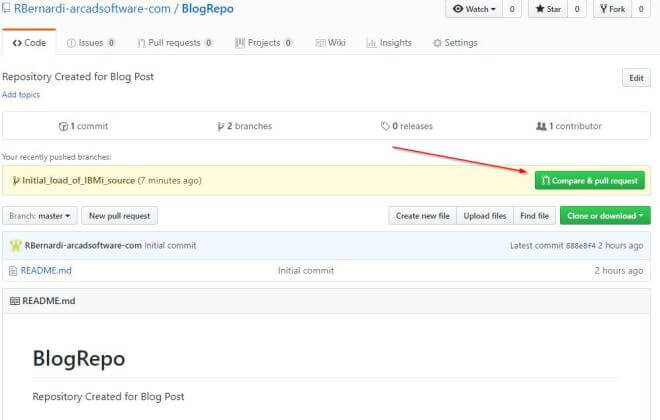
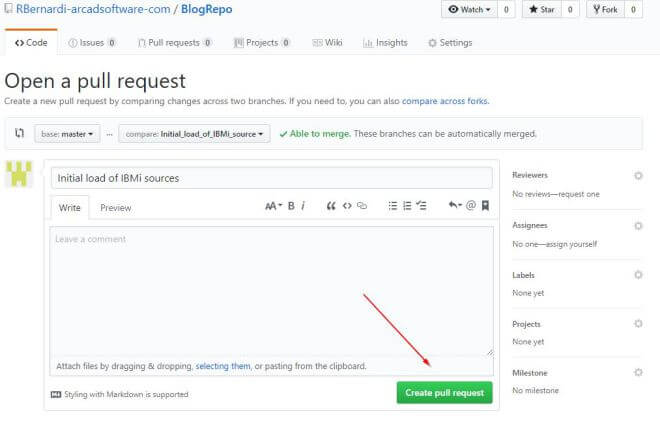
Right now we have a master branch, and a feature branch called Initial Load. From RDi we just “pushed” the feature branch up here to the remote. Now the remote has two branches. Typically someone is responsible for the next steps so the master branch stays clean. You can set roles and responsibilities in GitHub, for now we will perform the next steps ourselves. We need to take what was just pushed at us, look at it for conflicts, and if there are none, we need to “pull” it into the master branch.
Click the compare &pull request button to see the following:
Click the create pull request button, you can comment if you would like. You will see the following:
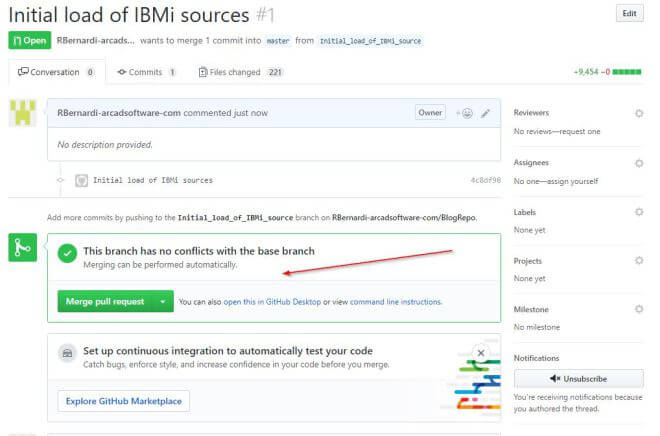
There will be no conflicts as we are doing an initial load and the master branch is empty. It will tell you there ore no conflicts and you should click the merge button. It will ask you to confirm as seen here:

Confirm it and you will see the following:

Your IBMi code is now on the master branch. The initial load branch can now be deleted if you’d like. It can also stay there indefinitely as well for future use. Discussions on how to use the Git repository are not part of this article, this was meant to get you started and to get your first IBMi code in that repository.
There’s one more thing I will show you to save you the heartache I went through to figure it out. How to add an existing Git repository to an IBMi project. What we just did was create a brand new repository, iProject and so on. That set us up on our PC to do all we needed to do to develop IBMi source using Git. What about a developer who’s part of the team but half a world away? How does he get the repository and start using it as well? It’s really pretty easy. That’s the good news.
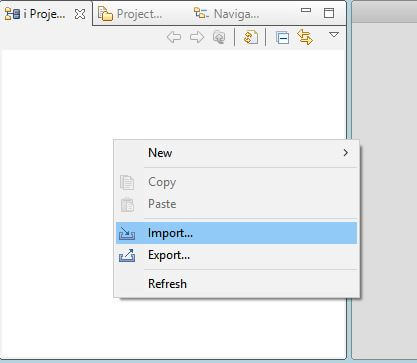
I have deleted the initial load branch in the GitHub repository for this example. The new developer needs RDi with eGit installed. They need to be able to log into the GitHub repository you created. They need to clone that repository, but they should not use the eGit view. I made that mistake and had no end of difficulty. In order to make it work with iProjects, you start from iProjects and you do an import as seem here:
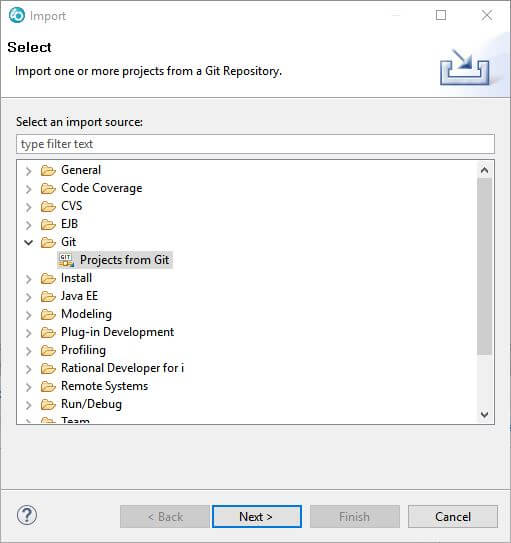
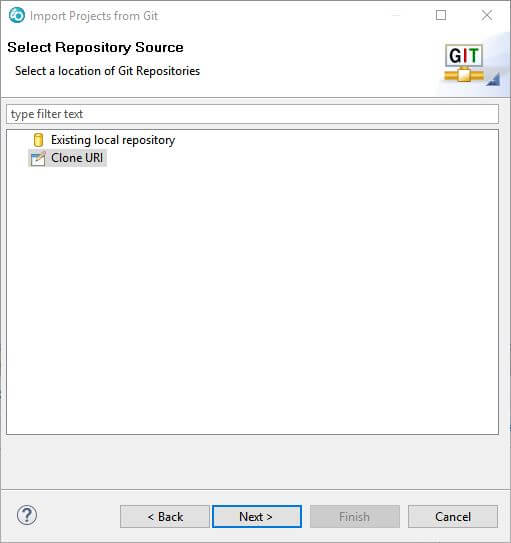
Select Git as seen here:
Select Clone URL:
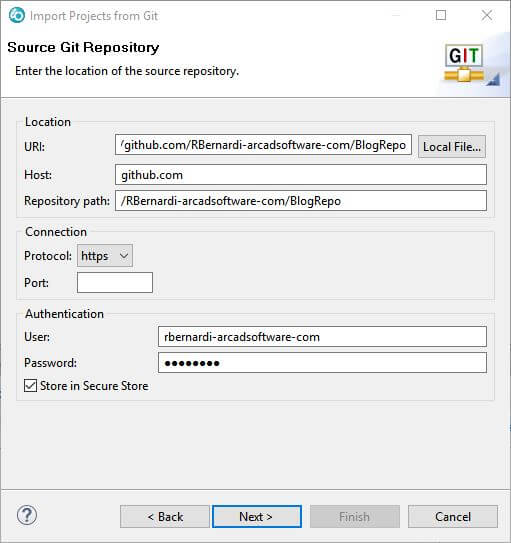
Give it your repository information:
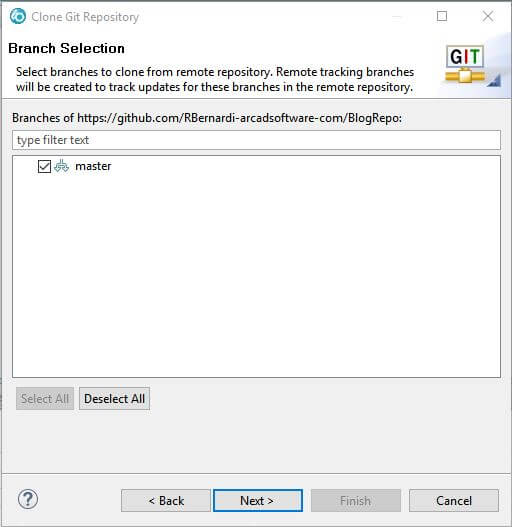
Click next, you’ll see the branches, in this case only the master as I merged the feature branch and deleted it:
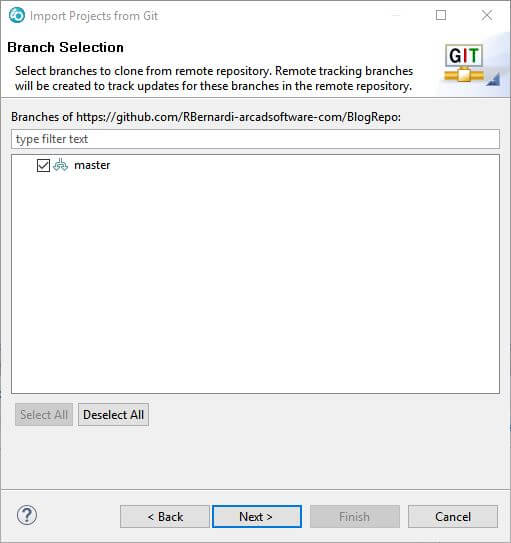
Make sure the master is selected and click next:
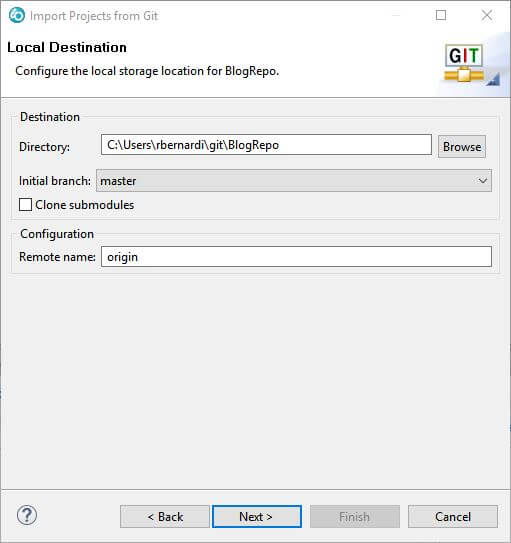
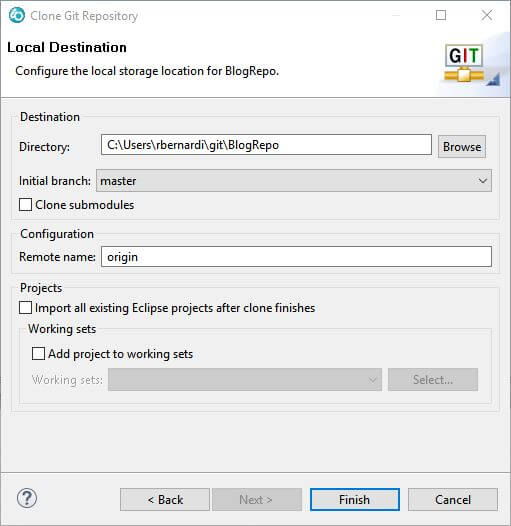
Leave the defaults and click next. You will see it doing things then it will present this panel:
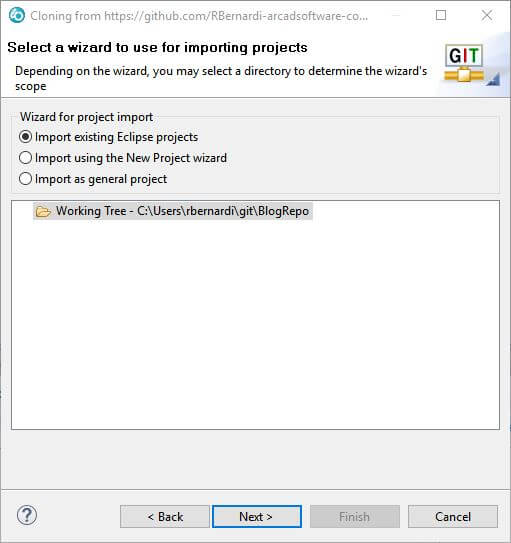
Just click next and you will see the final panel:
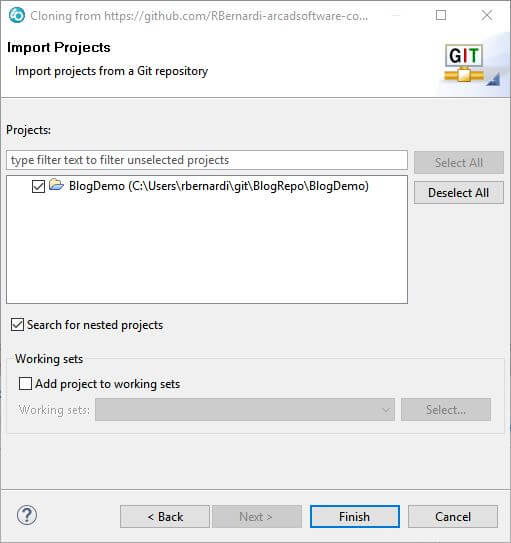
Click finish. That’s it.
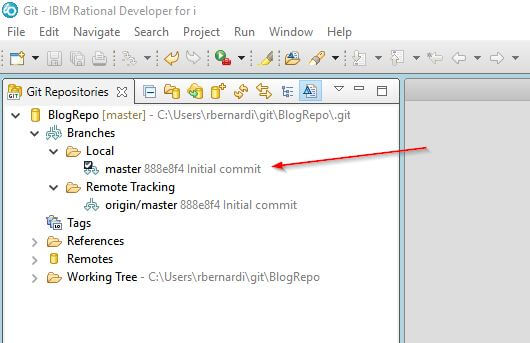
The iProject is created the eGit view sees the repository and you are ready to roll using RDi and Git.
I hope this was helpful. In my next blogs I will start to discuss actual development cycles using this setup.
Hope you enjoyed.

About the author
Ray Bernardi, Senior Consultant, ARCAD Software
Ray is a 30-year IT veteran and currently a Pre/Post Sales technical Support Specialist for ARCAD Software, international ISV and IBM Business Partner. He has been involved with the development and sales of many cutting edge software products throughout his career, with specialist knowledge in Application Lifecycle Management (ALM) products from ARCAD Software covering a broad range of functional areas including enterprise IBM i modernization and DevOps. In addition, Ray is a frequent speaker at COMMON and many other technical conferences around the world and has authored articles in several publications on the subject of application analysis and modernization, SQL, and business intelligence.

REQUEST A DEMO
Let’s talk about your project!
Speak with an expert